AR VR 3D Depth Sensor: An Evidence Plan for Auxiliary-Focus Prototypes
An AR/VR prototype lead rarely needs a generic claim that a sensor is accurate. The useful question is narrower: can this depth output support one auxiliary-focus interaction in one defined scene, with evidence another engineer can review? This guide turns that question into an evaluation record for an AR VR 3D depth sensor trial.
Purpleriver lists the MRP-LD1 Drone LiDAR Sensor for AR/VR auxiliary focusing. Its product page supplies a bounded starting point—SPAD dToF, 40×30 output, 10 fps, a 60°×45° field of view, listed indoor/outdoor ranges, and UART/UVC/UDP—but it does not establish headset compatibility, platform APIs, gesture recognition, latency, or success in your room. Treat those as prototype questions, not product claims.
Quick answer: what to prove first
Start with a scene card, not a feature list. Record the interaction volume, target materials, lighting, sensor placement, host input, and the rule that turns a depth observation into an auxiliary-focus decision. Retain raw or inspectable depth evidence alongside the decision output. Approve only the tested use case; leave untested platform and performance claims open.
1. Set the claim boundary before the AR/VR 3D depth sensor trial
Depth sensing can inform scene-aware software, but a physical module, a host pipeline, and an AR/VR experience are different layers. Keep the boundary explicit: the sensor is assessed for its observed output in a defined test; the host is assessed for its capture and logging path; the application is assessed for the interaction decision it makes from that record.
That separation mirrors an important implementation lesson in Apple's scene-depth documentation: its reference framework supplies a depth map with a confidence value and requires a support check for the chosen device and configuration. This is a useful evidence pattern, not a statement that MRP-LD1 exposes ARKit data or works with Apple hardware.
- Permitted product statement: the featured MRP-LD1 listing includes AR/VR auxiliary focusing among its approved applications.
- Prototype question: does a particular scene, target, host, and focus rule produce an observation the team considers usable?
- Not yet a claim: compatibility with a headset, phone, engine, SDK, tracking stack, or a specific performance result.
2. Choose the proof that matches the decision
| Decision to make | Minimum evidence to retain | Do not infer |
|---|---|---|
| Place the sensor for a small auxiliary-focus zone | Measured mounting pose, interaction-volume sketch, target positions, and field-of-view coverage | That every user position or room layout is covered |
| Accept a depth observation in the scene | Depth frame or point-cloud review, timestamp, target material, lighting note, and acceptance rule | That one clean frame proves robustness |
| Pass data to the prototype host | Chosen UART, UVC, or UDP path; host build; parser/format note; retained sample | That the module supports a named AR/VR SDK or engine |
| Use the result for auxiliary focusing | Predefined focus-zone rule, output log, and a pass/fail record for the stated scene | Eye tracking, user tracking, or autonomous application behavior |
A useful test is repeatable rather than theatrical. The peer-reviewed ToF-camera metrology procedure evaluates distance-related, amplitude/reflectivity, temporal, and environmental effects. It did not test MRP-LD1, so use it to shape what you record—not to transfer its figures to this product.
3. Product facts: a bounded starting point, not an application guarantee
Use the MRP-LD1 Drone LiDAR Sensor listing as the product-fact source. The table is deliberately limited to published fields relevant to an initial scene-depth prototype.
| Listed field | MRP-LD1 value | How it informs the evidence plan |
|---|---|---|
| Ranging principle / scanning principle | dToF / SPAD | Label the prototype record as a depth-sensing evaluation; do not compare it to another modality without a controlled test. |
| Output / frame rate | 40×30 / 10 fps | Record the observed frame and the application rule at that output; do not relabel it as high-resolution scene reconstruction. |
| Field of view | 60° horizontal × 45° vertical | Draw the proposed focus volume and verify where targets land in the actual installation. |
| Listed range | 0.5–25 m indoors; 0.2–8 m outdoors | Place trial targets at stated positions and record the scene conditions; listed range is not a result for every target. |
| Interfaces | UART, UVC, UDP | Choose one capture route and preserve the format/host assumptions with the sample data. |
| Approved application scope | AR/VR auxiliary focusing | Define one auxiliary-focus decision; do not expand it into unlisted platform compatibility. |
4. Build a scene-confidence card before the first demo
Write this card before connecting the application. It prevents a polished demo from hiding the one condition that made it work.
| Card field | What to record | Why it matters |
|---|---|---|
| Interaction volume | Near/far boundaries, width, height, and the intended focus target | Connects the feature request to a physical scene. |
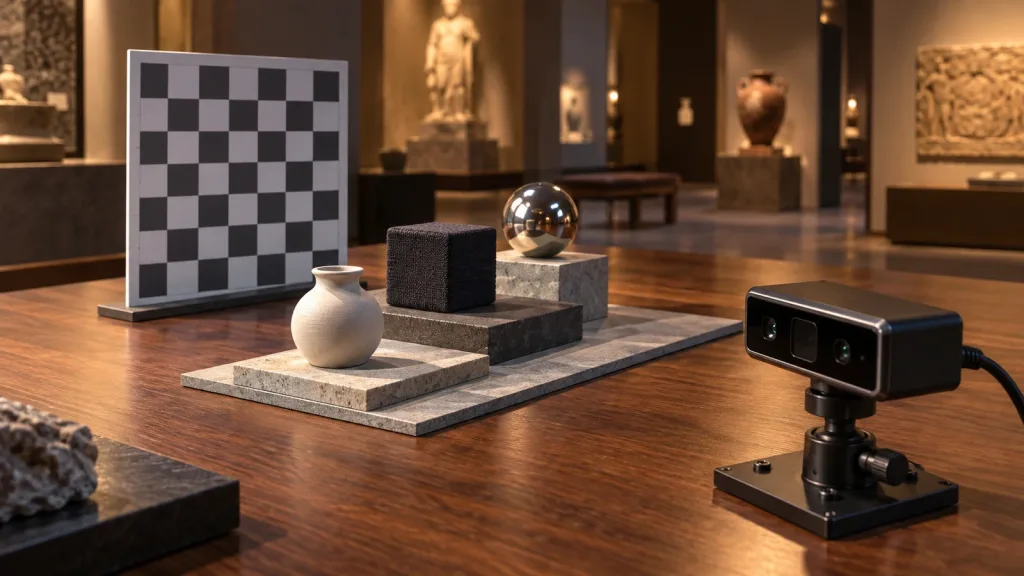
| Surface set | Matte, dark, glossy, patterned, and edge targets that are actually relevant | Prevents one friendly target from standing in for the installation. |
| Lighting state | Room lighting, windows, and any deliberate change between runs | Makes observations comparable without claiming universal lighting tolerance. |
| Sensor pose | Mount, angle, height, and distance from the interaction area | Lets another engineer recreate coverage. |
| Evidence packet | Representative output, timestamp, host configuration, decision result, and exceptions | Lets reviewers distinguish sensor output from application interpretation. |
For a reference visualization workflow, Apple shows how depth and confidence information can be reviewed as a point cloud in its scene-depth sample. Your host and data format may differ; the transferable practice is to retain an inspectable representation instead of only a green/red UI outcome.
5. Make the interface and data handoff reviewable
First choose the route that your evaluation host can capture and replay. MRP-LD1 lists UART, UVC, and UDP. A route is not automatically the right route because it is available: document why it was selected, what the host expects, and where raw or decoded samples are stored.
- Assign one owner for power and mounting, one for sensor capture, and one for the application rule.
- Record the interface, host operating environment, capture software or parser revision, and test timestamp.
- Save at least one normal scene, one challenging scene, and one no-decision/exception record.
- Attach a one-sentence description of how the application converts the retained output into an auxiliary-focus action.
- Use the site's UART, UVC, or UDP interface guide and integration-diagnosis guide to prepare the capture path, then request current documentation for the exact revision.
Do not quietly substitute an application-side confidence heuristic for sensor confidence, and do not call a depth stream an AR/VR SDK. These are separate interfaces with separate owners.
6. Illustrative application case: a tabletop auxiliary-focus zone
Consider a museum-table or product-demo station where the interaction team wants an auxiliary-focus cue only when a visitor reaches toward a marked object area. This is a planning example, not a claimed deployment or test result.
- Mount the compact module above or beside the table and sketch the 60°×45° listed field of view against the intended zone.
- Put the marked object area at several documented positions in the listed indoor range, then include a dark object, a reflective prop, and an edge near the boundary if they belong to the real experience.
- Capture inspectable depth output for each state through one chosen interface. Note the room lighting and any obvious gaps or unstable areas instead of deleting them.
- Define an auxiliary-focus rule that can return no decision. For example, the prototype may decline to issue a cue when the required region is not sufficiently represented in the retained observation.
- Review the packet with the experience owner. The result is a bounded decision—usable, revise the scene, or gather more evidence—not a blanket claim about AR/VR performance.
If the team needs a broader first-pass view of this application space, compare this evidence plan with the site's existing AR/VR dToF near-field prototype guide. Keep the present record focused on scene confidence and auxiliary focusing.
7. Common mistakes that weaken the evidence
- Calling a product listing an application result. Listed range, field of view, and interface availability are inputs to test design, not proof of the installed scene.
- Testing only one pale matte target. Use the relevant scene materials and note what was not tested.
- Keeping only screenshots of a successful UI. Preserve depth evidence, the host setting, and the rule used to decide.
- Skipping the no-decision path. A safe prototype needs a documented response when its precondition is not met.
- Promising platform compatibility by association. A reference depth API or visualization sample is not evidence that a separate module exposes that API.
- Mixing capture and application ownership. An unexplained parser or coordinate conversion can invalidate an otherwise useful scene test.
8. RFQ and evaluation checklist
Before requesting or accepting an evaluation unit, put these questions in the project brief:
- Which exact AR/VR auxiliary-focus decision will the prototype make, and what is explicitly out of scope?
- Which MRP-LD1 listed interface will be evaluated first, and which host will capture it?
- What interaction volume, target materials, lighting states, and sensor pose will the test record?
- What output sample and metadata must be retained for a reviewer to replay the decision?
- What outcome is pass, revise, or no decision?
- Which product facts must be reconfirmed in the current documentation before integration?
- Who owns mounting/power, capture/parsing, and application behavior?
- Which later platform or headset questions require separate compatibility work?
Turn an AR/VR concept into an evaluable depth-sensing request
Start with the MRP-LD1 product facts, one physical scene card, and one inspectable output path. For current integration material or a focused evaluation discussion, review the MRP-LD1 product page and Purpleriver documentation resources. Bring the target scene, interface preference, and the evidence you need—rather than an unsupported promise of application compatibility.